Python OpenGL 绘制烟花盛会
我们用OpenGL导演一场烟花盛会,献给即将到来的新年吧。
一说到OpenGL,很多人都会觉得复杂,其实不然。只要掌握了几个基本的概念,借助于工具软件,任何人都可以很轻松地上手。在制作烟花之前,我先介绍一下WxGL这个三维数据快速可视化工具。
1. 安装WxGL
WxGL是一个基于PyOpenGL的三维数据可视化库,以wx为显示后端,提供Matplotlib风格的交互式应用方式。WxGL也可以和wxPython无缝结合,在wx的窗体上绘制三维模型。使用pip命令即可快速安装WxGL及其所依赖的其他模块。
pip install wxgl
2. 快速体验
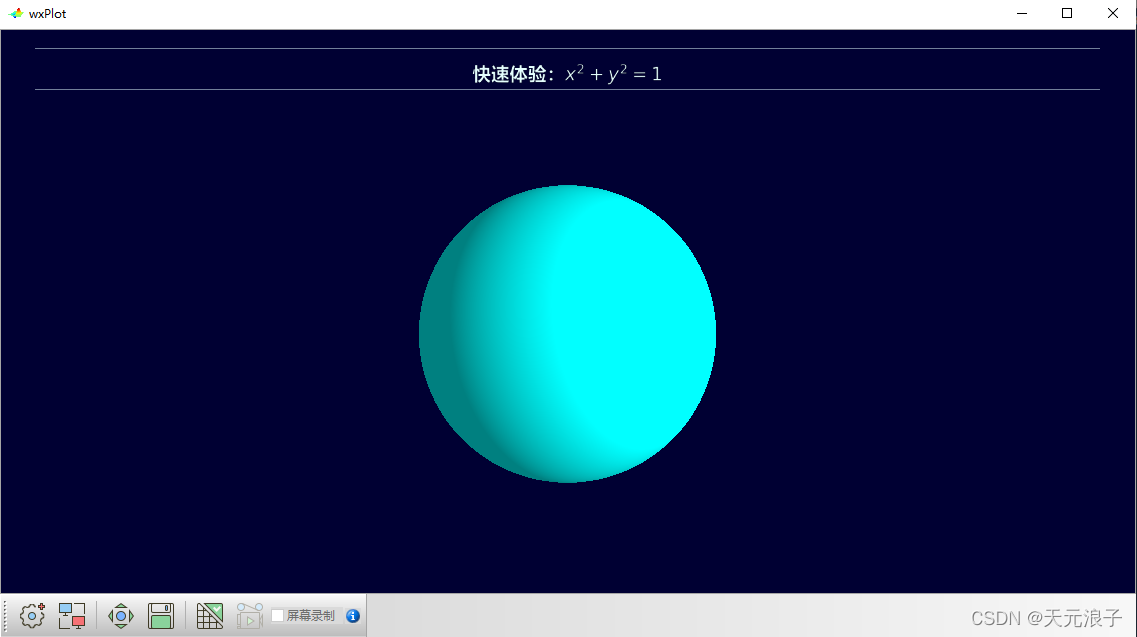
下面这几行代码,绘制了一个中心在坐标原点半径为1的纯色圆球。忽略模块名的话,这些代码和Matplotlib的风格是完全一致的。
>>> import wxgl.wxplot as plt
>>> plt.uvsphere((0,0,0), 1, color='cyan')
>>> plt.title('快速体验:$x^2+y^2=1$')
>>> plt.show()
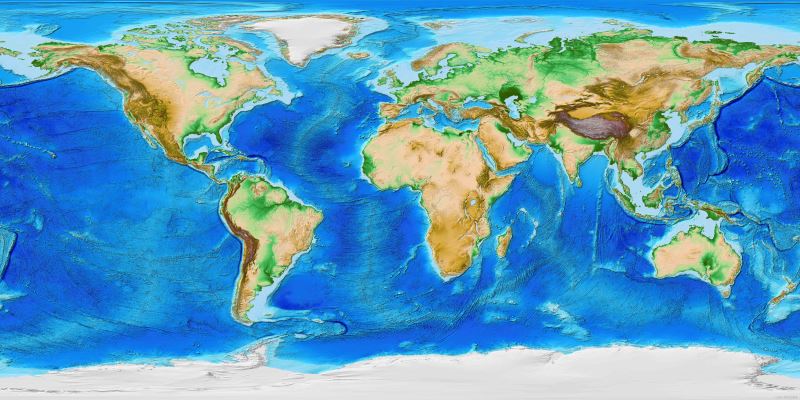
生成一个地球模型是如此简单。
>>> plt.uvsphere((0,0,0), 1, texture='res/earth.jpg', xflip=True, yflip=False)
>>> plt.show()
让地球自转,更是易如反掌。
>>> plt.uvsphere((0,0,0), 1,
  texture='res/earth.jpg',
  xflip=True,
  yflip=False,
  transform = lambda tn,gms,tms : ((0, 1, 0, (0.01*tms)%360),)
)
>>> plt.show()
勾选“屏幕录制”,点击“播放”按钮,即可保存为gif文件或mp4/avi格式的视频文件。

这是代码中用的的地球纹理图片,可以直接下载使用。
3. 编写自己的着色器
WxGL不仅提供了线段、散点、曲面、三维等值面等一系列绘图函数,还支持用户定制着色器程序,以实现更复杂的功能。下面这个例子,用粒子技术模拟了烟花升空的过程。
# -*- coding: utf-8 -*-

import numpy as np
import wxgl
import wxgl.wxplot as plt

def rise(n, pos, h, v, a, cycle):
  """烟花升空模型

  n       - 粒子数量
  pos     - 初始位置
  h       - 上升行程
  v       - 初始速度
  a       - 上升加速度
  cycle   - 循环周期
  """

  vshader_src = """
      #version 330 core
      in vec4 a_Position;
      in vec4 a_Color;
      in float a_Delay; // 粒子发射延迟时间(s)
      uniform float u_Ts; // 持续时间(s)
      uniform float u_V; // 初始速度
      uniform float u_A; // 上升加速度
      uniform mat4 u_MVPMatrix;
      out vec4 v_Color;
      out float v_Ts;
      void main() {
          float t = u_Ts - a_Delay;
          if (t < 0) t = 0;

          float s = u_V * t + 0.5 * u_A * t * t;
          gl_Position = u_MVPMatrix * vec4(a_Position.x, a_Position.y+s, a_Position.z, a_Position.w);
          gl_PointSize = 1;
          v_Color = a_Color;
          v_Ts = u_Ts;
      }
  """

  fshader_src = """
      #version 330 core
      in vec4 v_Color;
      uniform float u_Tmax;
      in float v_Ts;
      void main() {
          if(v_Ts > u_Tmax) discard;

          vec2 temp = gl_PointCoord - vec2(0.5);
          float f = dot(temp, temp);
          if(f > 0.25) discard;

          gl_FragColor = vec4(v_Color.rgb, 1);
      }
  """

  vs = np.array(pos) + (np.random.random((n,3)) - 0.5) * h/100
  color = np.tile(np.array((1.0,1.0,0.8)), (n,1))
  delay = np.float32(np.absolute(np.random.randn(n))) / 10
  tmax = (pow(v*v+2*a*h, 0.5)-v)/a + delay.max()

  m = wxgl.Model(wxgl.POINTS, vshader_src, fshader_src, sprite=True)
  m.set_vertex('a_Position', vs)
  m.set_color('a_Color', color)
  m.set_argument('a_Delay', delay)
  m.set_argument('u_Ts', lambda tn,gms,tms:(tms/1000)%cycle)
  m.set_argument('u_V', v)
  m.set_argument('u_A', a)
  m.set_argument('u_Tmax', tmax)
  m.set_mvp_matrix('u_MVPMatrix') # 设置模型矩阵、视点矩阵和投影矩阵

  return m

vs = np.array([
  [-1.5,2,1], [-1.5,0,1], [1.5,2,1], [1.5,0,1],
  [-1.5,2,-1], [-1.5,0,-1], [1.5,2,-1], [1.5,0,-1]])
vs = vs[[0,1,2,3,0,2,1,3,4,5,6,7,4,6,5,7,0,4,1,5,2,6,3,7]]
m = rise(n=500, pos=(0,0,0), h=1.5, v=2, a=-1.2, cycle=5)

plt.figure(zoom=0.7, elev=10)
plt.line(vs, color=(0,1,1), method='isolate') # 六面体线框,表示烟花燃放的空间
plt.model(m)
plt.show()
4. 绽放的烟花
只要理解了烟花升空的代码,很容易写出烟花在空中爆炸的着色器程序。下面的代码除了烟花升空的着色器,还提供了两种烟花爆炸的着色器,其中用到了一个纹理图片,可直接下载下面这张图使用。

如果将上面的纹理图片替换成文字,就可以在烟花爆炸的瞬间显示出文字了。WxGL提供了一个文本转PIL图形对象的函数,可以直接作为纹理使用。
# -*- coding: utf-8 -*-

import numpy as np
import wxgl
import wxgl.wxplot as plt

def rise(n, pos, h, v, a, cycle):
  """烟花升空模型

  n       - 粒子数量
  pos     - 初始位置
  h       - 上升行程
  v       - 初始速度
  a       - 上升加速度
  cycle   - 循环周期
  """

  vshader_src = """
      #version 330 core
      in vec4 a_Position;
      in vec4 a_Color;
      in float a_Delay; // 粒子发射延迟时间(s)
      uniform float u_Ts; // 持续时间(s)
      uniform float u_V; // 初始速度
      uniform float u_A; // 上升加速度
      uniform mat4 u_MVPMatrix;
      out vec4 v_Color;
      out float v_Ts;
      void main() {
          float t = u_Ts - a_Delay;
          if (t < 0) t = 0;

          float s = u_V * t + 0.5 * u_A * t * t;
          gl_Position = u_MVPMatrix * vec4(a_Position.x, a_Position.y+s, a_Position.z, a_Position.w);
          gl_PointSize = 1;
          v_Color = a_Color;
          v_Ts = u_Ts;
      }
  """

  fshader_src = """
      #version 330 core
      in vec4 v_Color;
      uniform float u_Tmax;
      in float v_Ts;
      void main() {
          if(v_Ts > u_Tmax) discard;

          vec2 temp = gl_PointCoord - vec2(0.5);
          float f = dot(temp, temp);
          if(f > 0.25) discard;

          gl_FragColor = vec4(v_Color.rgb, 1);
      }
  """

  vs = np.array(pos) + (np.random.random((n,3)) - 0.5) * h/100
  color = np.tile(np.array((1.0,1.0,0.8)), (n,1))
  delay = np.float32(np.absolute(np.random.randn(n))) / 10
  tmax = (pow(v*v+2*a*h, 0.5)-v)/a + delay.max()

  m = wxgl.Model(wxgl.POINTS, vshader_src, fshader_src, sprite=True)
  m.set_vertex('a_Position', vs)
  m.set_color('a_Color', color)
  m.set_argument('a_Delay', delay)
  m.set_argument('u_Ts', lambda tn,gms,tms:(tms/1000)%cycle)
  m.set_argument('u_V', v)
  m.set_argument('u_A', a)
  m.set_argument('u_Tmax', tmax)
  m.set_mvp_matrix('u_MVPMatrix') # 设置模型矩阵、视点矩阵和投影矩阵

  return m, tmax

def bomb_1(n, pos, start, a, cycle):
  """烟花爆炸模型

  n       - 粒子数量
  pos     - 位置
  start   - 时间
  a       - 下降加速度
  cycle   - 循环周期
  """

  vshader_src = """
      #version 330 core
      in vec4 a_Position;
      in vec3 a_Data;
      uniform float u_Ts;
      uniform float u_Start;
      uniform float u_A;
      uniform mat4 u_MVPMatrix;
      out vec4 v_Color;
      out float v_Ts;
      void main() {
          float t = u_Ts - u_Start;
          if (t < 0) t = 0;

          float lat = radians((a_Data.x - 0.5) * 90);
          float lon = radians(a_Data.y * 360);
          float r = (a_Data.z * 0.3 + 0.7) * 0.3 * t * (1 + 0.3 * a_Position.z);
          float y = r * sin(lat) + a_Position.y - 0.5*u_A*t*t;
          float xz = r * cos(lat);
          float x = xz * cos(lon) + a_Position.x;
          float z = xz * sin(lon) + a_Position.z;

          gl_Position = u_MVPMatrix * vec4(x,y,z,a_Position.w);
          gl_PointSize = 3 * t;
          v_Ts = t;

          int i = gl_VertexID % 6;
          if (i == 0) v_Color = vec4(1,0,0,1);
          else if (i == 1) v_Color = vec4(0,1,0,1);
          else if (i == 2) v_Color = vec4(0,0,1,1);
          else if (i == 3) v_Color = vec4(1,1,0,1);
          else if (i == 4) v_Color = vec4(0,1,1,1);
          else v_Color = vec4(1,0,1,1);
      }
  """

  fshader_src = """
      #version 330 core
      in vec4 v_Color;
      in float v_Ts;
      void main() {
          if(v_Ts <= 0 || v_Ts > 2) discard;

          vec2 temp = gl_PointCoord - vec2(0.5);
          float f = dot(temp, temp);
          if(f > 0.25)  discard;

          //float alpha = v_Color.a * exp(1-30*f) * (4-v_Ts*v_Ts)/2;
          float alpha = v_Color.a * (1-4*f) * (4-v_Ts*v_Ts)/2;
          gl_FragColor = vec4(v_Color.rgb, alpha);
      }
  """

  vs = np.tile(np.array(pos), (n,1))
  data = np.float32(np.random.random((n,3)))

  m = wxgl.Model(wxgl.POINTS, vshader_src, fshader_src, sprite=True, opacity=False)
  m.set_vertex('a_Position', vs)
  m.set_argument('a_Data', data)
  m.set_argument('u_Start', start)
  m.set_argument('u_A', a)
  m.set_argument('u_Ts', lambda tn,gms,tms:(tms/1000)%cycle)
  m.set_mvp_matrix('u_MVPMatrix') # 设置模型矩阵、视点矩阵和投影矩阵

  return m

def bomb_2(pos, start, texture, a, size, cycle):
  """烟花爆炸模型

  pos     - 位置
  start   - 时间
  texture - 纹理
  a       - 下降加速度
  cycle   - 循环周期
  """

  vshader_src = """
      #version 330 core
      in vec4 a_Position;
      uniform float u_Ts;
      uniform float u_Start;
      uniform float u_A;
      uniform float u_Size;
      uniform mat4 u_MVPMatrix;
      out float v_Ts;
      void main() {
          float t = u_Ts - u_Start;
          if (t < 0) t = 0;

          if (t < 2) gl_PointSize = t * u_Size/2 * (1 + 0.3 * a_Position.z);
          else gl_PointSize = u_Size * (1 + 0.3 * a_Position.z);

          gl_Position = u_MVPMatrix * vec4(a_Position.x, a_Position.y-0.5*u_A*t*t, a_Position.z, a_Position.w);
          v_Ts = t;
      }
  """

  fshader_src = """
      #version 330 core
      uniform sampler2D u_Fireworks;
      in float v_Ts;
      void main() {
          if(v_Ts <= 0 || v_Ts > 2) discard;

          vec4 color = texture2D(u_Fireworks, gl_PointCoord);
          gl_FragColor = vec4(color.rgb, color.a*(4-v_Ts*v_Ts)/2);
      }
  """

  vs = np.array(pos).reshape(-1,3)

  m = wxgl.Model(wxgl.POINTS, vshader_src, fshader_src, sprite=True)
  m.set_vertex('a_Position', vs)
  m.set_argument('u_A', a)
  m.set_argument('u_Size',size)
  m.set_argument('u_Start', start)
  m.set_argument('u_Ts', lambda tn,gms,tms:(tms/1000)%cycle)
  m.add_texture('u_Fireworks', texture, wxgl.TEXTURE_2D, yflip=False)
  m.set_mvp_matrix('u_MVPMatrix') # 设置模型矩阵、视点矩阵和投影矩阵

  return m

if __name__ == '__main__':
  vs = np.array([[-1.5,2,1], [-1.5,0,1], [1.5,2,1], [1.5,0,1], [-1.5,2,-1], [-1.5,0,-1], [1.5,2,-1], [1.5,0,-1]])
  vs = vs[[0,1,2,3,0,2,1,3,4,5,6,7,4,6,5,7,0,4,1,5,2,6,3,7]]

  plt.figure(zoom=0.5, elev=10)
  plt.line(vs, color=(0,1,1,0), method='isolate') # 六面体线框,表示烟花燃放的空间

  # ------------------------------
  h, v, a, cycle = 1.7, 2.2, -1.2, 4
  for i, ch in enumerate('新春快乐'):
      x = -1.5 + i
      m1, start = rise(n=300, pos=(x,0,1), h=h, v=v, a=a, cycle=cycle)
      m2 = bomb_1(200, (x,h,1), start, a=0.1, cycle=cycle)
      m3 = bomb_2((x,h,1), start, wxgl.text2image(ch, 96, (1,0,0)), a=0.1, size=100, cycle=cycle)
      plt.model(m1)
      plt.model(m2)
      plt.model(m3)

  # -------------------------------
  for i in range(20):
      x, z = (np.random.random()-0.5)*4, (np.random.random()-0.5)*2
      h, v, a = 1.5+(np.random.random()-0.5)*0.4, 2.2, -1.2
      cycle = np.random.randint(4, 7)
      m1, start = rise(n=300, pos=(x,0,z), h=h, v=v, a=a, cycle=cycle)
      m2 = bomb_1(200, (x,h,z), start, a=0.1, cycle=cycle)
      plt.model(m1)
      plt.model(m2)

  # -------------------------------
  for i in range(20):
      x, z = (np.random.random()-0.5)*4, (np.random.random()-0.5)*2
      h, v, a = 1.5+(np.random.random()-0.5)*0.4, 2.3, -1.2
      cycle = np.random.randint(4, 7)
      m1, start = rise(n=300, pos=(x,0,z), h=h, v=v, a=a, cycle=cycle)
      m2 = bomb_2((x,h,z), start, 'res/fw.png', a=0.1, size=300, cycle=cycle)
      plt.model(m1)
      plt.model(m2)

  plt.show()
最终的效果如下面的gif所示。

关于Python OpenGL绘制一场烟花盛会的文章就介绍至此,更多相关Python OpenGL烟花内容请搜索编程宝库以前的文章,希望以后支持编程宝库!
2048小游戏——准确的来说确实是一个简单版本的!呐呐呐 ,主要是担心很多小伙伴儿直接上界面版本的看不懂,所以做了这款简单的2048,先看这篇简单版本的吧! ...